

If you’re looking to create a fun and simple game, Pong is a classic option that is easy to develop using utalic’s low-code app development platform. In this tutorial, we’ll walk you through the steps of creating a Pong game using utalic, complete with a projectile, a moveable bounce pad, and a “Game Over” zone.
Step 1: Create a New Project in utalic
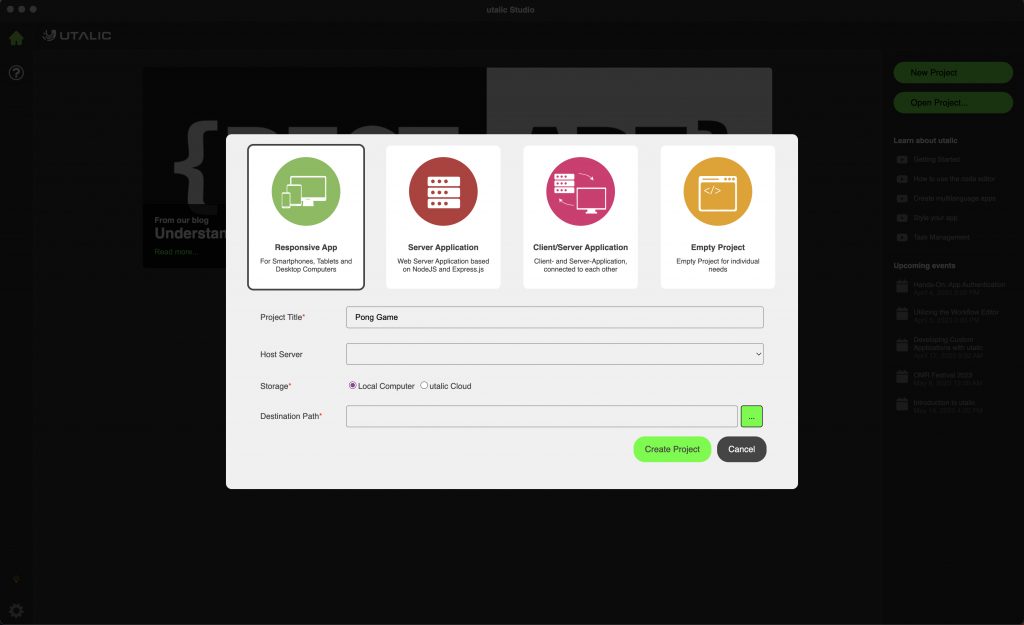
To begin, open utalic and create a new project. Select the “Responsive App” option from the four project types available. Give your project a suitable name and create a storage file to hold your data. Make sure your storage file is empty to avoid error messages. Click on “Create Project” to initiate the process.
Step 2: Add Shapes to Your Visual Scene
In utalic, adding various shapes to your visual scene is a breeze with the toolbox. Locate the “Shape” tool within the toolbox and add a projectile and moveable bounce pad to your visual scene. Customize the shape type by accessing the object properties and selecting the desired option under the “shape” category. Give each shape a distinct name so that you can easily distinguish between them later on. For we will need a projectile that will move around and a moveable bounce platform.

Step 3: Access the Workflow Editor
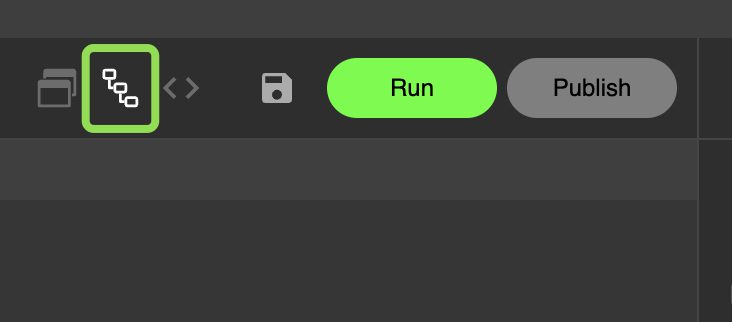
To access the workflow editor, look for an icon located at the right top of your screen next to the “Run” button. Click on this icon to open the editor and get started.
Step 4: Add an Event to the Workflow Editor
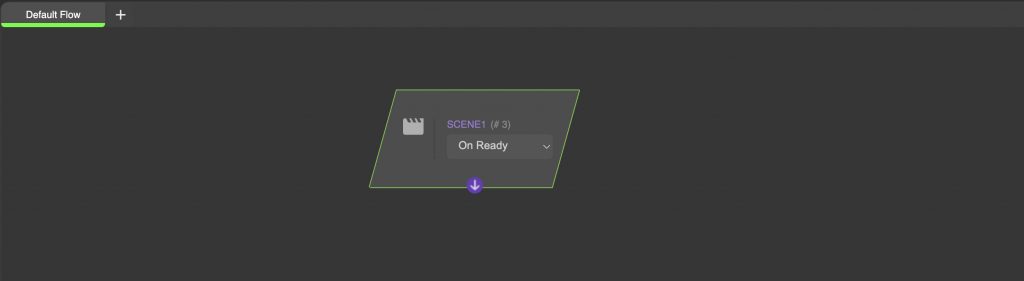
The first step in building your workflow is to add to add your “OnReady” event of your existing scene called “scene 1” to the editor. To do this, look for the “event” section in the workflow toolbox. Once you’ve found it, locate the tool that allows you to add scenes and click on it. Click anywhere in the workflow editor to add your scene. Set the scene to “on Ready” to specify when you want the scene to be activated
Step 5: Include the "Store Data" Action in Your Workflow
The “Store Data” tool can be found in the “Flow” section of the workflow toolbox. Click on it to add it to your workflow. This tool will allow you to store data related to your game, such as high scores or user preferences, we will use it to decide if the projectile goes up, down, left, or right. For now, you can set the data as “1”. It should looks something like this:
Step 6: Add Logic for moving the Projectile
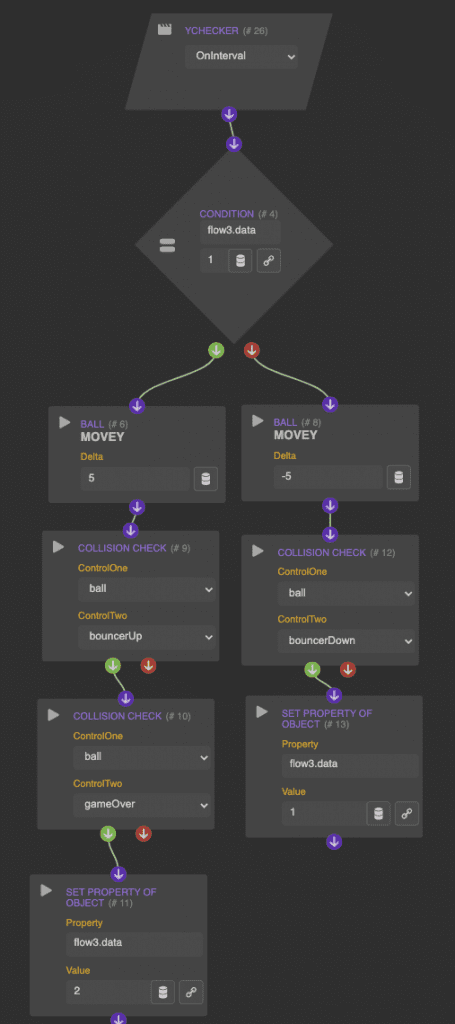
To begin, we will need to add an interval for the scene and a condition checker to the workflow. This will allow us to check the stored data at regular intervals and make updates to the scene accordingly.
Once we have added the necessary tools to the workflow, we will need to configure the condition checker to check whether the stored data is equal to 1. If it is, we will use the MoveY tool to make the projectile move downwards. Additionally, we will add an event tool called “check collision” to check for collisions with the moveable bounce pad.
If the projectile hits the bounce pad, we will change the stored data to 2. This will cause the condition checker to return false, and we will need to use the MoveY tool again to make the projectile move upwards by adding this time a value of “-10”. This will simulate the bouncing effect of the projectile.
By adding these mechanics to the workflow, we can create a basic pong game that is functional and fun to play. As you become more comfortable with utalic, you can add additional features to the game, such as sound effects, multiple levels, and high score tracking.
Step 7: Add Logic for moving Platform
To move the bounce pad, we need to create two visual shapes on each side of the bottom of the scene to represent the buttons that we will use to make the bounce pad move.
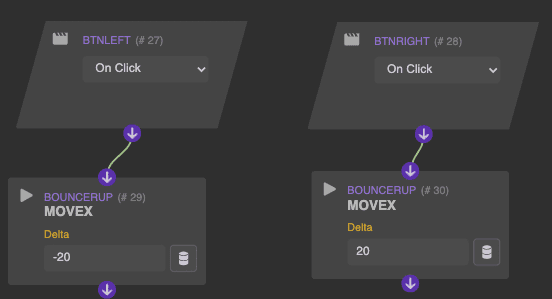
Next, we need to add these two shapes to the workflow editor and include the “on click” event for each of them. After this, we can add one “MoveX” action for each button, which will move the bounce pad to the left or right depending on which button is clicked.
We can add a value of 10 pixels in one “MoveX” action and -20 pixels in the other “MoveX” action to ensure that the bounce pad moves in the correct direction. Once these actions are set up, we can connect the shapes with the “MoveX” actions.
In the end, our workflow should include the two shapes, each with the “on click” event, and two “MoveX” actions, with one set to 10 pixels and the other to -20 pixels. The final result should be a workflow that allows the bounce pad to move left or right when the corresponding button is clicked.
Step 8: Creating the walls
To halt our projectile from flying into oblivion we will need to create some walls so our projectile can bounce of them. To add the walls to the scene, you can use the same process as before to add rectangles to the visual scene in utalic. Make sure to give each rectangle a unique name, such as “top wall”, “left wall”, and “right wall”.
Once you have added the walls to the visual scene, you can go back to the workflow editor and add them to the workflow as well. To do this, you can use the same process as before, selecting the “event” section in the workflow toolbox and choosing the appropriate tool to add each wall to the editor.
For each wall, you will want to specify when you want it to be activated. To do this, you can set each wall to “on Ready” in the same way you did for the scene earlier.
To make the projectile bounce off the walls, you will need to add a collision checker to the workflow editor. This can be found in the “Event” category of the workflow toolbox. Select the collision checker tool and add it to the workflow editor.
In the collision checker’s settings, you can specify which shapes you want to check for collision. In this case, you will want to check for collision between the projectile and each of the three walls.
Step 9: "Game Over"
Adding a game-over zone to your game is an important step to provide a clear ending to the game. To add this feature, you can add a small shape at the bottom of your scene, which will represent the game-over zone. In the workflow editor, you can use the collision checker tool as mentioned earlier to check if the projectile has touched the game-over zone.
To add a small popup message when the projectile touches the zone, you can use the “popup message” action from the toolbox in the workflow editor. Once the popup message action is added to the workflow, you can add a message of your choice that will appear when the projectile collides with the game-over zone. Make sure to connect these two panels together to ensure that the popup message is triggered when the projectile collides with the game-over zone.
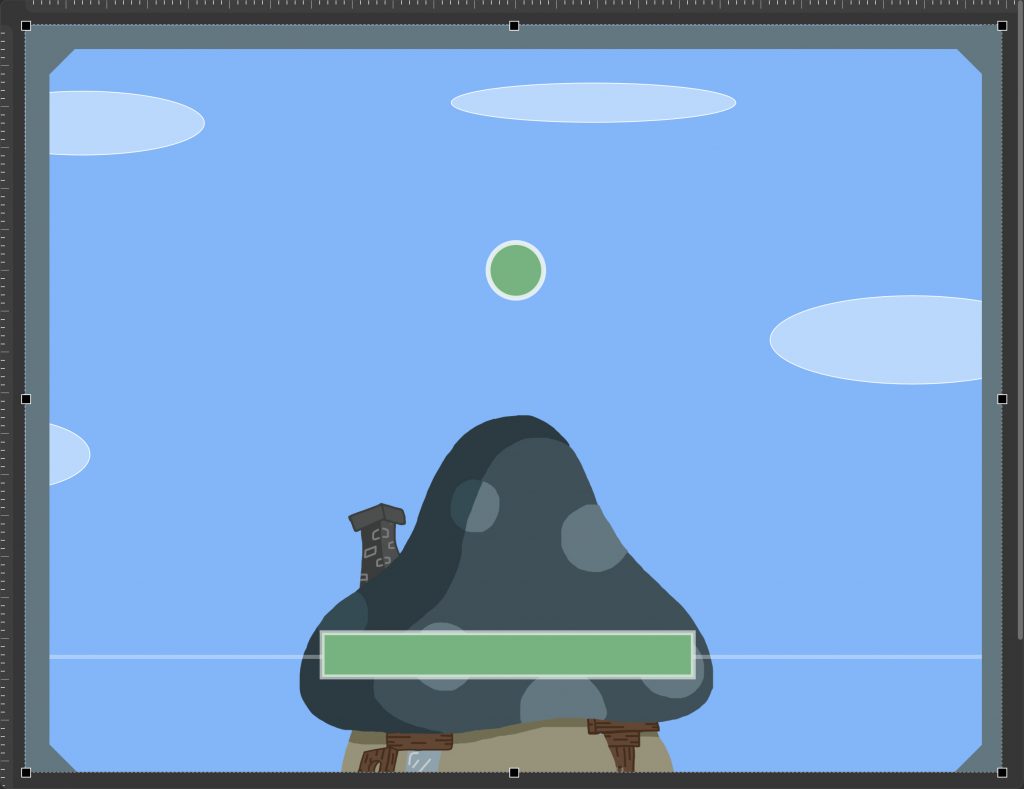
In the end, your scene could look like this:
Cover Image by rawpixel.com on Freepik